Design Walls
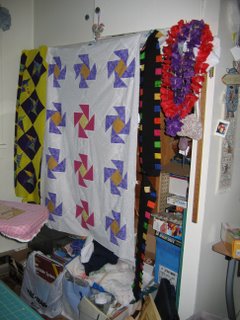
Reading Nancy's blog has prompted me to share my design wall. Simple, easy and out of the way when I need it to be. My mom hung cafe curtain rod hooks (about 5 ft apart) on the wall above the door opening of the closet in MCM.
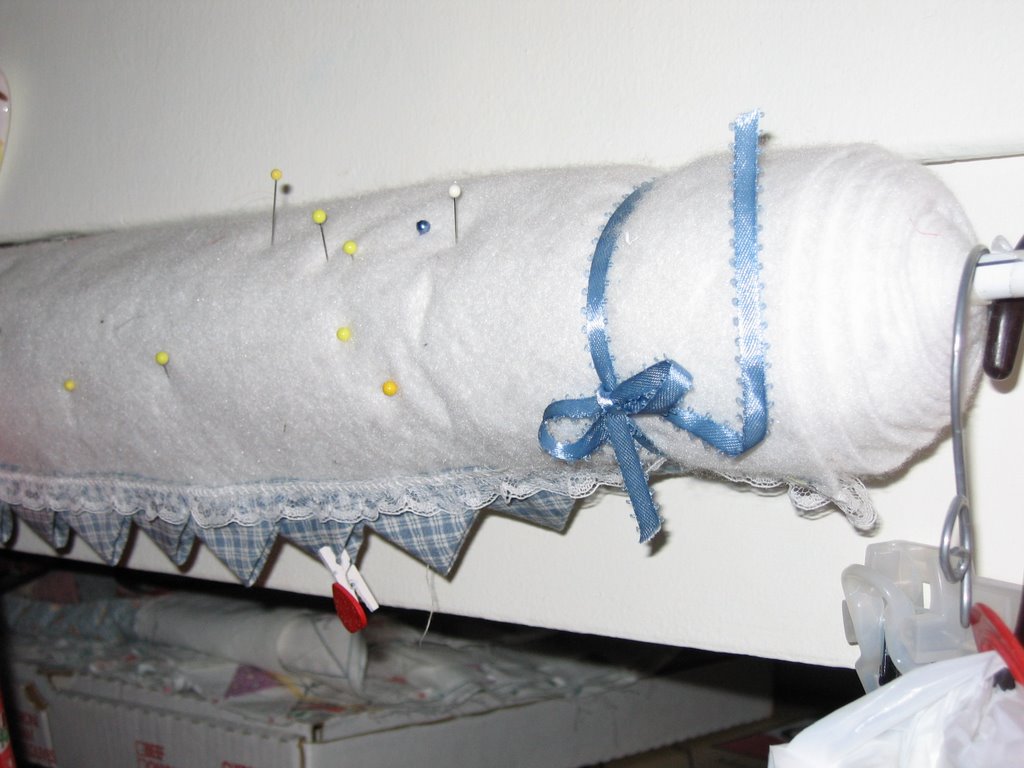
She then took the rod and duct taped thermal lamb across the rod, rolled it once, tightly slipped stitched it to itself, then hung the rod up and let the thermal lamb hang to the floor (5½ ft) where she cut it off, then rolled it up on the rod, put a decorative border (prairie points to match the valences on the windows) and added a bit of lace. There are 3 sets of ribbon that I use to tie the rolled thermal lamb in place when I am not using the design wall.
This is great for more than one reason.
- I can layer my projects
- I can leave it rolled up or unrolled
- I can roll projects up while pinned to it
- I can unroll it if the closet storage area is unsightly (like that ever happens)


Anyway, it was easy to make, very inexpense and a quick fix for my teeny tiny space. I love it and think that even if I had more space I would still do it this way.
On another note: I think the "free midnight snack" sign has once again been posted in our yard ....raccoons came avisitin' last night and helped themselves to one of our Koi!!! GRRRR. They also decided the best place to eat it would be on the deck, leaving the tail fin and some snail shell...EWWWW! So...we did a major search for ways to keep varments away from the pond and decided the best way to do so was to soak rags in amonia and lay them on the rock around the pond for a few nights...here's hoping!!!


14 Comments:
Actually, the pictures with your description make it pretty clear. I will have to think about whether something like this might work in the 5-er. Right now i just pin stuff to the soft cushion that's on the slide out. =) And there's a 20 x 30 piece of foam core next to the door out.
Your instructions are pretty clear. I have flanelette stretched over two pieces of foam insulation material and fastened permanently to the wall. I am lucky to have a large sewing room in our art studio so I don't have to put it away. BTW it still gets in a huge mess regularly.
I like it!...and I understand how it was made. MIGHT work for me..thanks!
This comment has been removed by a blog administrator.
thought your written directions perfect Pam-and nope, never saw that before photo! mine is just about back to that stage of mess...so the old photos apply :-)...
I understood perfectly. My original thought before I found a space for a permanent design wall was to hang cup hooks at the top of the wall in front of my closet and hang a flannel backed tablecloth from them with binder clips. I got so far as to buy the cup hooks, binder clips and tablecloth but never got it hung. Hopefully the permanent wall will get built in about 2-1/2 weeks.
GROSS! Dang raccoons! too bad you couldn't put an electric fence around the pond...that's what my DH would do! Love ya, M~
Wow waht a neat idea that is! xoxo melzie
Very clever design wall!
Hey, check out what these guys had for visitors over the weekend! LOL
http://alifethatshoutsyourname.blogspot.com/
I love your design wall.... how difficult is it to roll up?
someone told me if your pond is aerated, you can lay a window screen down over the pond to keep cats and racoons out... don't know I don't have a pond, but might work
What a cool idea for a design wall!
EWWW! Your poor fish. And yuck on having to clean up after those varmints.
My soon-to-be sewing room is right inside my front door, so I'm going to have to think of something different. Maybe I can have it inside the sliding closet door and can keep it rolled up above.
It's so nice that your grandkids were able to stay for several days, they'll remember those days for years to come.
Love you idea for the design wall!
Don't feel bad about "the overflow of stuff"...it happens to me also! I saw a Koi pond w/"chicken wire" suspended over the surface, just for the reason of those "pesky raiding raccons",it worked.
Post a Comment
<< Home