Sewing Cookie Tutorial

Disclaimers...
- this is not my original pattern
- I am a visual person, you will get a better idea from the pictures than from my text.
- Feel free to ask questions, I'll do what I can to help
- and please DON'T shoot the messenger!!!
Supplies:
- plastic carton (I used a one gallon vinegar bottle
- fabric
- quilting or button hole thread
- iron
- scissors
Here is the template, you will need to enlarge it so that it measures 2" across and 4" long.
Cut three of these from the plastic.
Slightly round the tips just so that they are not pointy enough to poke through your fabric.
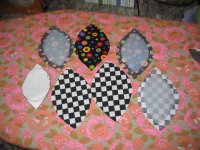 Using your plastic pieces cut 6 pieces of fabric (3 for the inside of your cookie, 3 for the outside).
Be sure to add a 1/4 " seams all around.
Press the 1/4" seam all around the plastic form on all 6 pieces of fabric **being very careful not to melt the plastic!**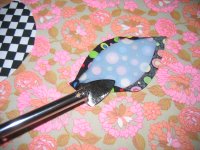
Now here is the first tricky part (yes, there are more tricky parts to come!)
You will make a sandwich out of one inside piece of fabric, one outside piece of fabric and one plastic form. This is a bit tricky and will take some time, but once you have the first one figured out the last 2 will be easy (*¿~)! start on one side, using the OUTSIDE fabric, fold the seam over the plastic. Hold that in place while getting an INSIDE piece of fabric, folding that seam and pinning in place. Put one pin on each side, one pin on each point. Then go back and continue pinning around the form. When you are done with this step, it will look like this:
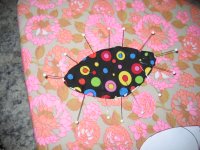
Using quilting or button hole thread (you want it to be a heavier weight to hold up to the sewing process as well as years of use!) stitch all the way around your form, try not to let your fabric become slack. Enclose each form this way.
You at the end of this step you will have 3 pieces that look like this:
OK, tricky part #2 ( and only one to go!)
Lay 2 pieces INSIDES together, stitch the two pieces together along one side from point to point, making sure your stitches are tight and will hold firmly.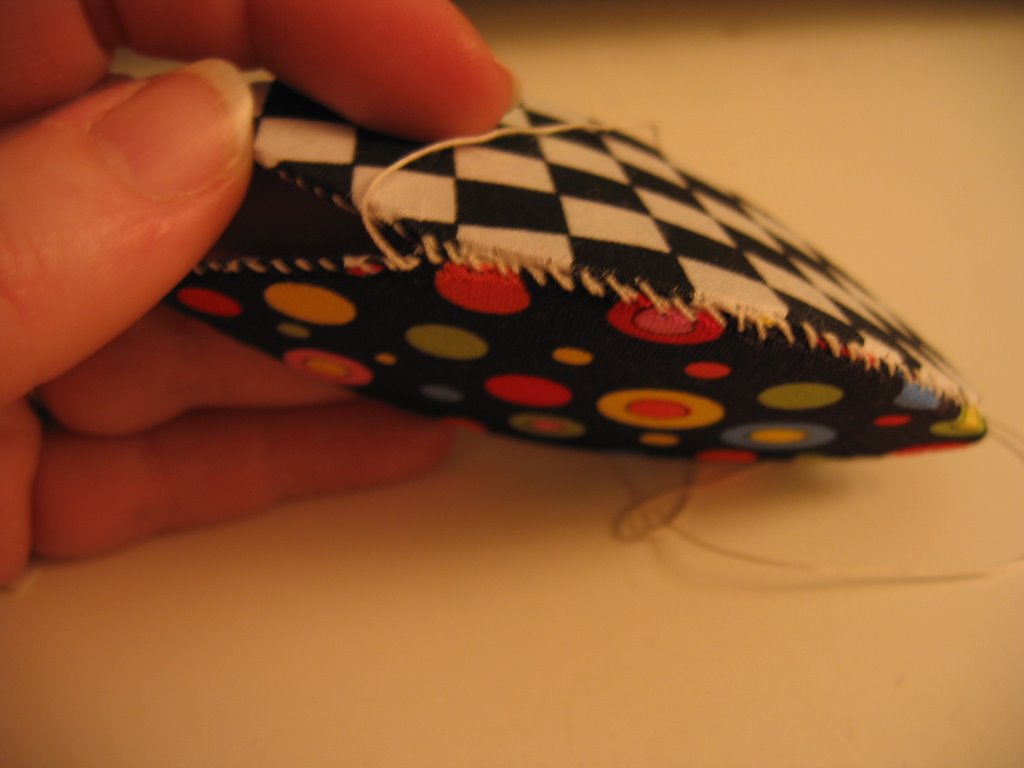
OK, almost done....do you see it taking shape?? Good! See, I knew you could do this!
Time to add the 3rd piece, which means we are at Tricky Part #3.
This might be a good place to get your tongue in place, or just go ahead and say "that" word that helps you to accomplish something...maybe go slam a door or take a quick mile run...just get the frustration over and done with before you start this final step, you will need to give this your 100% undivided attention.
Hold the joined pieces so that they are open a bit. Your 3rd piece will nestle in that spot. Knot your thread and take a stitch in one point of the already joined pieces. Now take a stitch in the third piece, pull that stitch tight and take a couple more stitches to get it good and anchored. Now work your way across joining the 3rd piece to the first 2 pieces.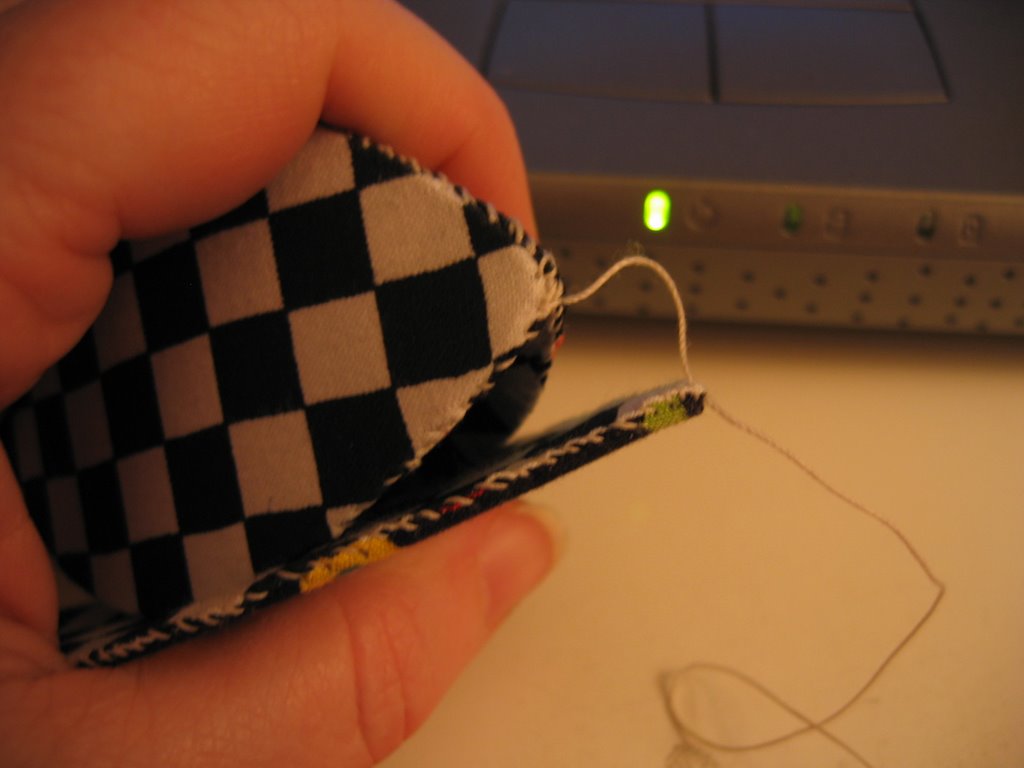
When you get to the other point, take a few stitches, making them good and tight.

Now....you just think you are done....but you aren't quite finished....
Add:
- thimble
- thread
- scissors (yes, a tiny pr will fit in there! the folding scissors fit as well)
- slip a couple of pins and a needle in
- and don't forget a chocoloate kiss, who can sew without chocolate!!


Great job! If you make one please send me a picture.


10 Comments:
Hmmm...I really liked the one you made at quilt camp. Glad you posted the directions...and pics- because I need to SEE what I am doing :) I may attempt to make one of these! YAM.
What a great idea! I have to give this a try.
Great job on the tutorial--I know you put a lot of time and effort into getting this ready for blogger land!
How long do you think it takes to make this?
Very cute. I'm not sure I'm into that tricky hand sewig but you never know. I might give it a try. You have done very clear instructions.
awesome visual instructions Pam! these are perfect for a small gift for many of my quilting buddies...thanks so much.
Your project looks like fun I'll have to try one. Or more.
Thanks,
Lizzy
I'm going to make one of these soon. I really need a small pouch like that. Thanks for taking the time to give us the instructions.
These are SO cute! And guess what? That black fabric is the border on my Matchstick Marimba ( 1st class I ever taught...) don'tcha just LOVE it when someone ELSE likes "your" fabric! Like seeing an old friend. I hope I have time to make some of these this week...GREAT giftie!
They look great, must have a go at one those. Now I know what to those funny little iron things are for :o))
Post a Comment
<< Home